Introduction
This guide outlines some tips and tricks for using the discourse topic creation tools and functions. How to style the content of your posts, and how to use some of the added features on our forum.
This guide has many sections for the styling copied from this guidebook I found, I figured others may find it useful as well.
Discourse Documents Page
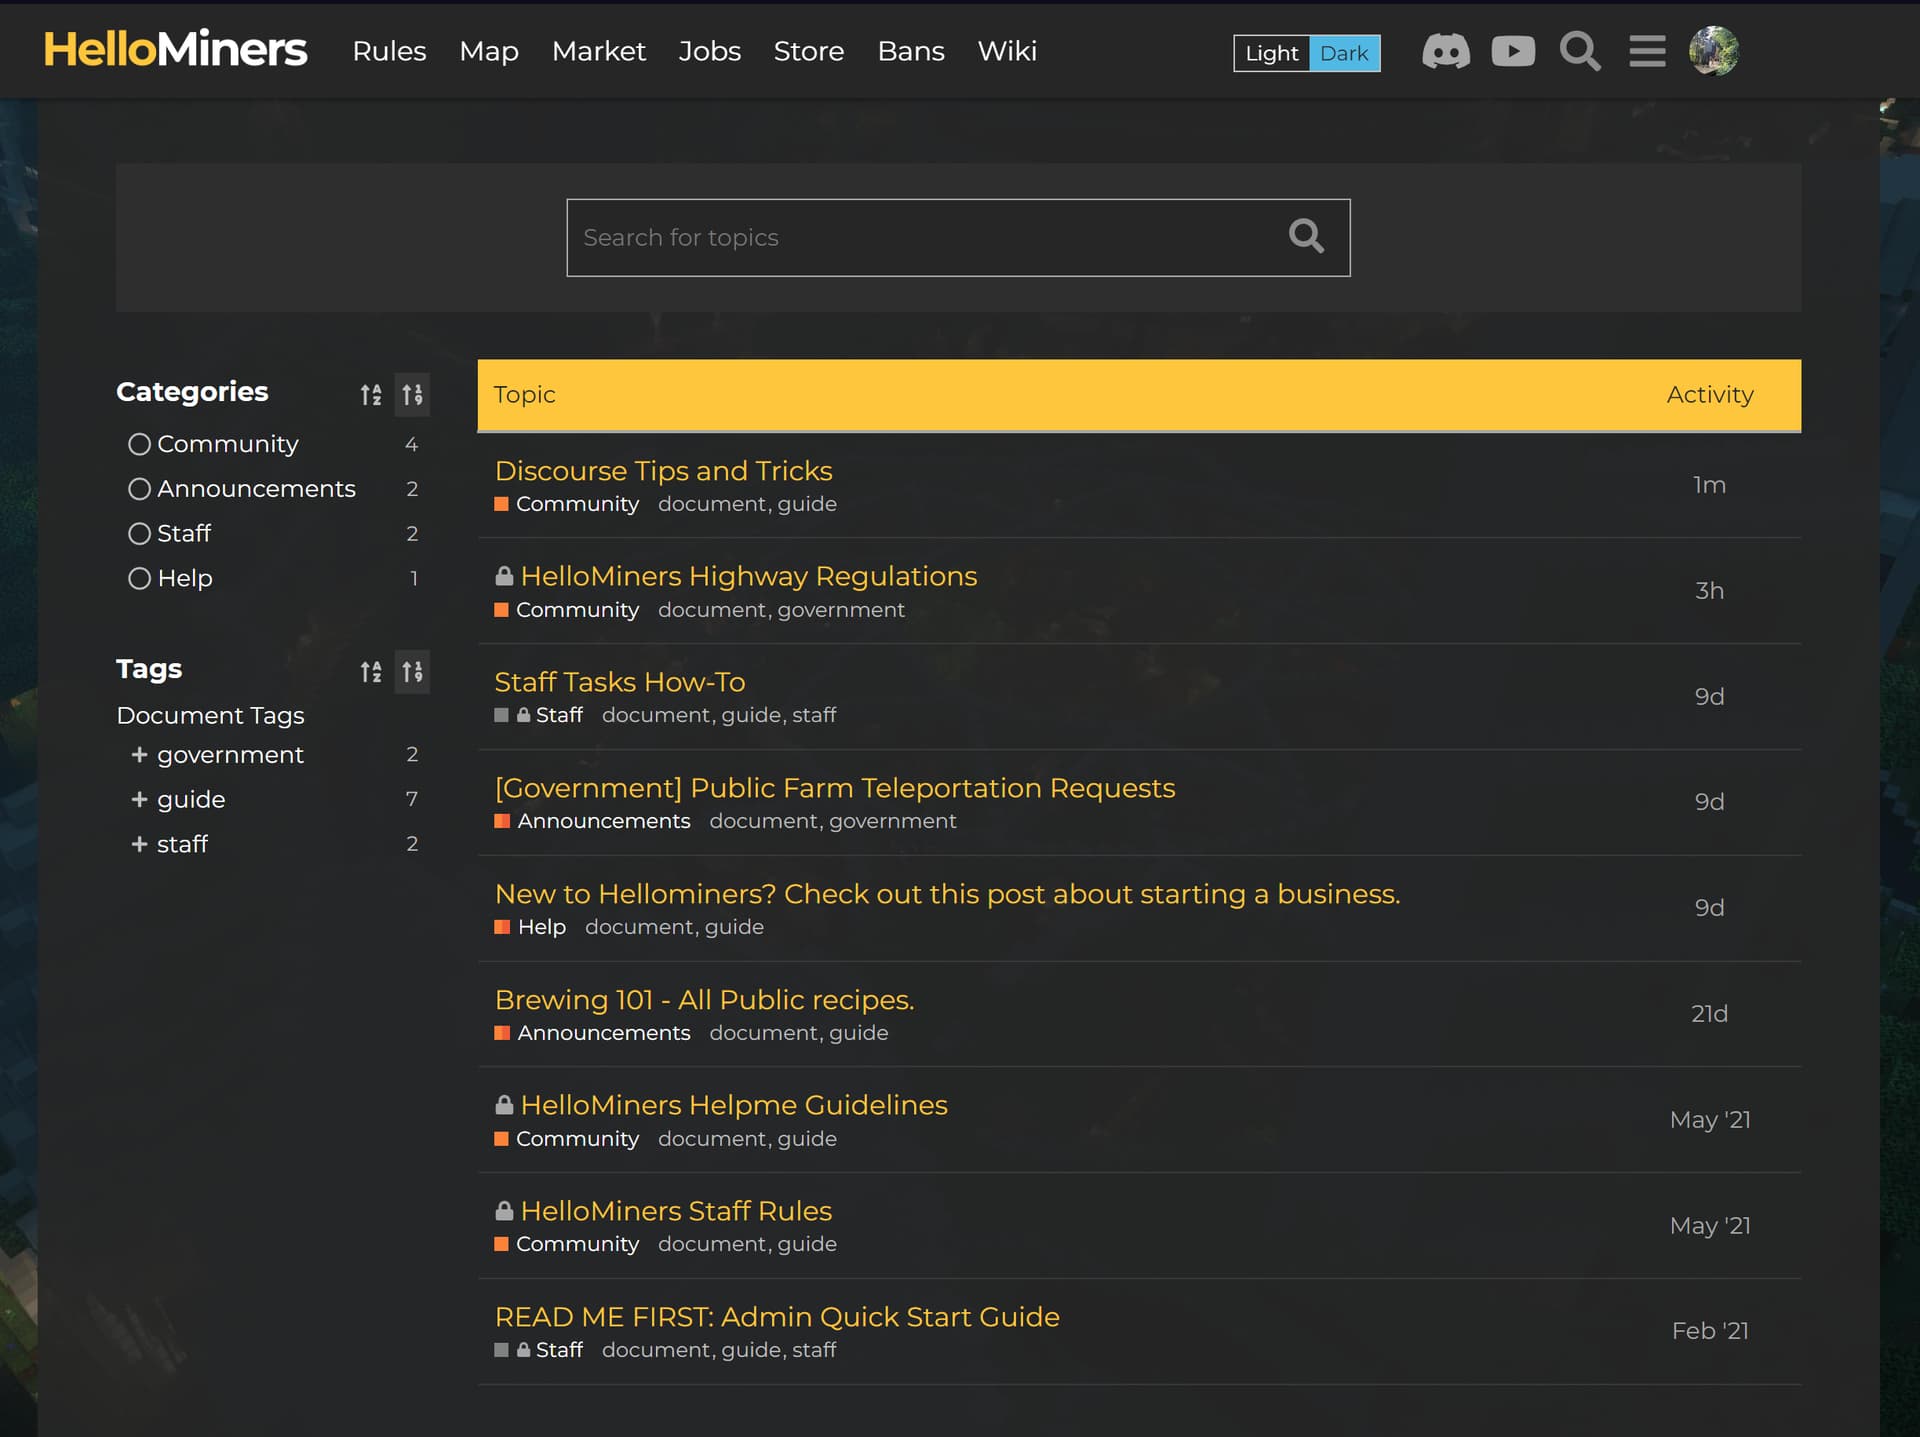
The discourse documents plugin was recently added to the forums. This plugin adds a new page, seen below and at https://hellominers.com/docs where you can view and easily filter through any post that has been created using the correct tags for docs.
I have converted a few posts already to use the correct tags for documents, just to show what it will look like.
Document Tags
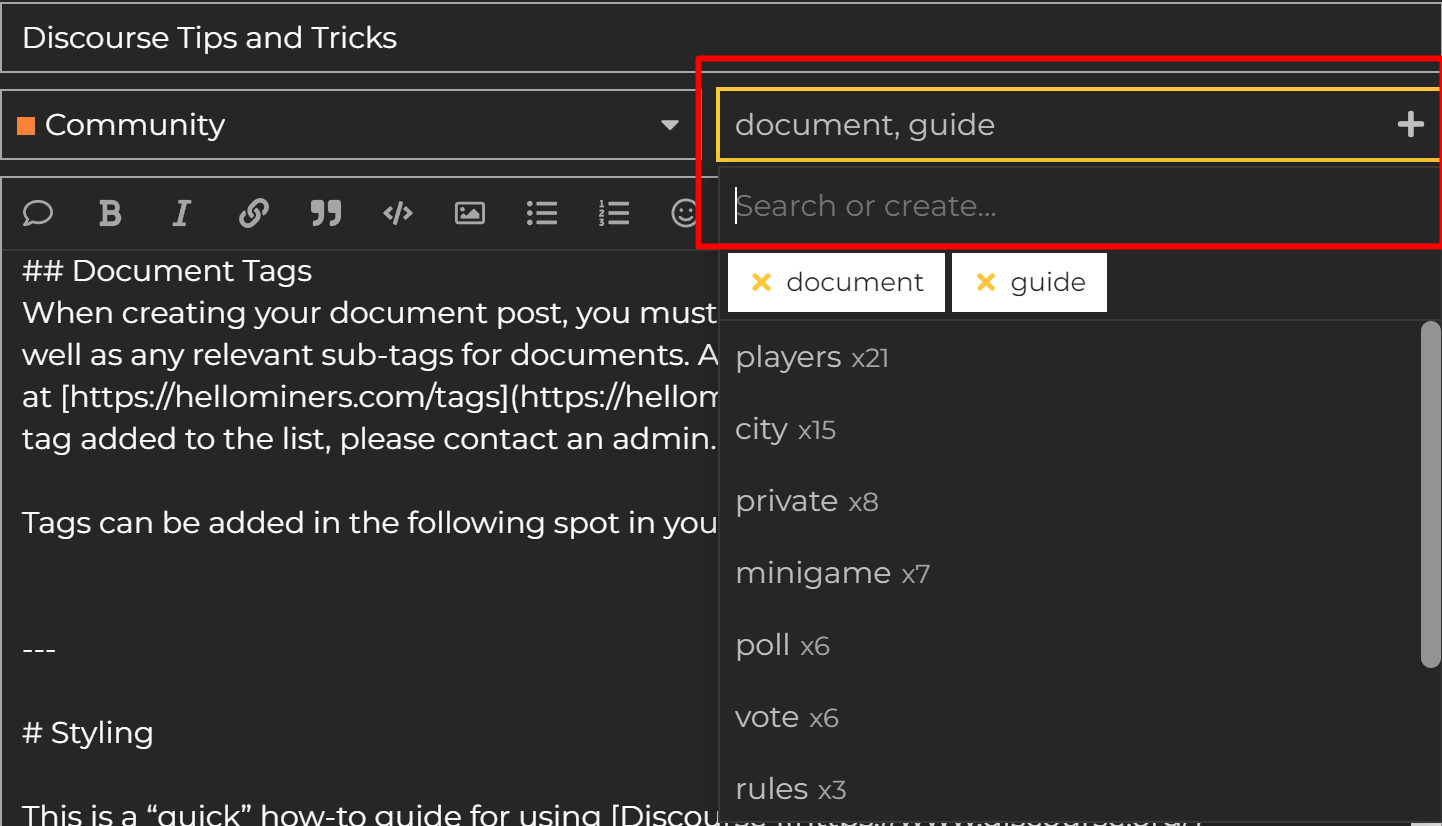
When creating your document post, you must add the document tag to your post, as well as any relevant sub-tags for documents. All tags available for documents can be fount at https://hellominers.com/tags. If you would like a specific tag added to the list, please contact an admin.
Tags can be added in the following spot in your post editor:
Styling
This is a “quick” how-to guide for using Discourse forum/community software. It contains a majority of the common features avialble to users/content editors, but may not have complete coverage of the featureset. If anyone sees anything to add or correct, feel free to comment. If you’d like to learn more about the Discourse Editor’s syntax take a look at the commonmark (a flavor of markdown) docs for more info.
Links
Most of the time you’d want to use the editor bar or hotkey crtl+k, but the basic format is [link text](https://hellominers.com) which will give you an example link that looks like this: link text
Note - Easier Editing with Links
Having long URLs intermingled in your editor can sometimes make it a pain so you can also offset the links using the syntax in the example below. Note you must have a blank line above the reference and the reference id can be any number, text, or punctuation.
This paragraph is much easier to read in the [editor][1] because you can
[include][hmlink] the links below the paragraph text or at the bottom of the page.

[1]: https://hellominers.com
[hmlink]: https://hellominers.com/t/hellominers-community-rules/23470
This paragraph is much easier to read in the editor because you can include the links below the paragraph text or at the bottom of the page.
Images
Adding images is quite easy, if there’s an image in your clipboard, just paste it in, the forum will automatically upload the image and fill in the appropriate syntax to make the image appear. If you are linking an image which is already on the web, use the following syntax.  Result:

Image Sizing
If you would like to resize a large image to a smaller image use the following syntax.


Original
Resized 50% By PixelsText Formatting
For bold, italics and strike-through use the editor buttons ![]() or directly type the markdown:
or directly type the markdown:
**bold word** or __bold word__
*italicized word* or _italicized word_
_combo of **bold** and **italic**_
~~strike-through word~~
bold word or bold word
italicized word or italicized word
combo of bold and italic
strike-through word
Alternatively, there’s some BBCode sytnax that a person can use
[b]like this[/b] like this
[i]or this[/i] or this
[u]underline[/u] underline
Font color is not natively supported, but there is a BBCode plugin that will allow for changes in font color.
One can also have some choice to change fonts or colors using the LaTeX-based mathjax plugin covered in the mathjax section of this guide. $\color{red}{red text}$ redtext
Headings
# H1
## H2
### H3
#### H4
##### H5
###### H6

horizontal rule is 3+ asterisks
***
horizontal rule
Lists
You can use the editor buttons for ordered![]() or unordered
or unordered![]() lists.
lists.
1. First ordered list item
2. second list item
   * sub-lists are offset by three spaces
1. Specific numbers
1. don't matter they will auto increment
1. auto increment

* unordered lists
* are also possible
- First ordered list item
- Explicit second list item
- sub-lists are offset by three spaces
- Specific numbers
- don’t matter they will auto increment
- auto increment
- unordered lists
- are also possible
Code Formatting
Inline code formatting
Surround a section of code with backticks () inline code formatting. **Typing:** var x = 10;**Results in:**var x = 10;This can also be done asvar x = 10;` inline.
Present entire line as code by prefixing four (4) spaces (an extra newline before this)
Typing :
var this = “is a line”;
Results in :
var this = "is a line";
Multi-Line Blocks of Code
Surrounding code with three backticks ``` will allow for code to span multiple lines
Typing:
function foo(bar){
return bar+1;
}
Results in:
function foo(bar){
    return bar+1;
}
Syntax Highlighting
The code block will try to automatically choose a style for code, but you can explicitly call out the desired formatting.
function foo(bar){
return bar+1;
}
Results in:
function foo(bar){
    return bar+1;
}
Tables
Tables are second class citizens in Discourse, some of the formatting features and niceties work and some don’t.
Protip - The easiest way to get a table into discourse is to start a table in an spreadsheet, then copy & paste that table into the editor window. Discourse natively handles the format change and makes creating a table much easier. Excel and Google Sheets work great using this method.
A markdown table in Discourse needs at least the first two lines to exist:
|Color|Weight|Height|
|-|-|-|
|red|12|160|
|green|4|100|
| Color | Weight | Height |
|---|---|---|
| red | 12 | 160 |
| green | 4 | 100 |
You can also use HTML for tables .
<table>
  <tr>
    <th>Color</th>
    <th>Weight</th>
    <th>Height</th>
  </tr>
  <tr>
    <td>red</td>
    <td>12</td>
    <td>160</td>
  </tr>
  <tr>
    <td>green</td>
    <td>4</td>
    <td>100</td>
  </tr>
</table>
| Color | Weight | Height |
|---|---|---|
| red | 12 | 160 |
| green | 4 | 100 |
Blockquotes
Blockquotes can be found in the editor bar button![]()
Puting a greater than sign > in front of so a line will create blockquotes
Typing:
this is some blockquoted text
this is another line of blockquoted text
this is not blockquoted
this is another one
Results in:
this is some blockquoted text
this is another line of blockquoted text
this is not blockquoted
this is another one
Table of Contents
Manual Method
The manual method of creating a table of contents within the body of your topic can be found below:
* [link to first heading](https://hellominers.com/t/discourse-tips-and-tricks/25070#first-one-16)
* [link to second heading](https://hellominers.com/t/discourse-tips-and-tricks/25070#second-one-17)
* [link to third heading](https://hellominers.com/t/discourse-tips-and-tricks/25070#third-one-18)
* [link to fourth heading](https://hellominers.com/t/discourse-tips-and-tricks/25070#fourth-one-19)
which results in:
First One
some text
Second One
more text
Third One
even more text
Fourth One
ok no more text
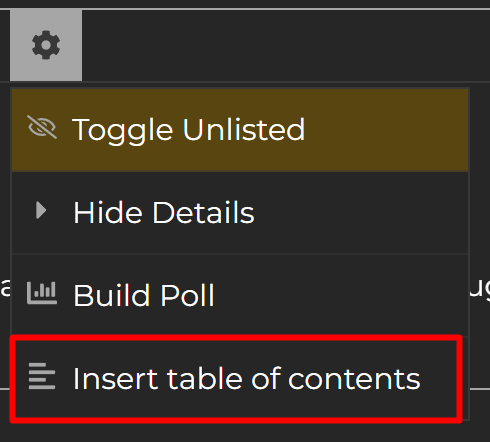
Plugin Method
You can create a table of contents automatically thanks to the table of contents plugin. You can create it by selecting the following in the body text box banner:
Make sure this <div> is on the first line of the post and there is an empty line between it and your content.
<div data-theme-toc="true"> </div>

# Introduction
You’ll know it is configured correctly if you see this

Images
It is possible to upload images to Discourse; however, the preference is that users will host from a site like imgur. If you can host it elsewhere, please do.
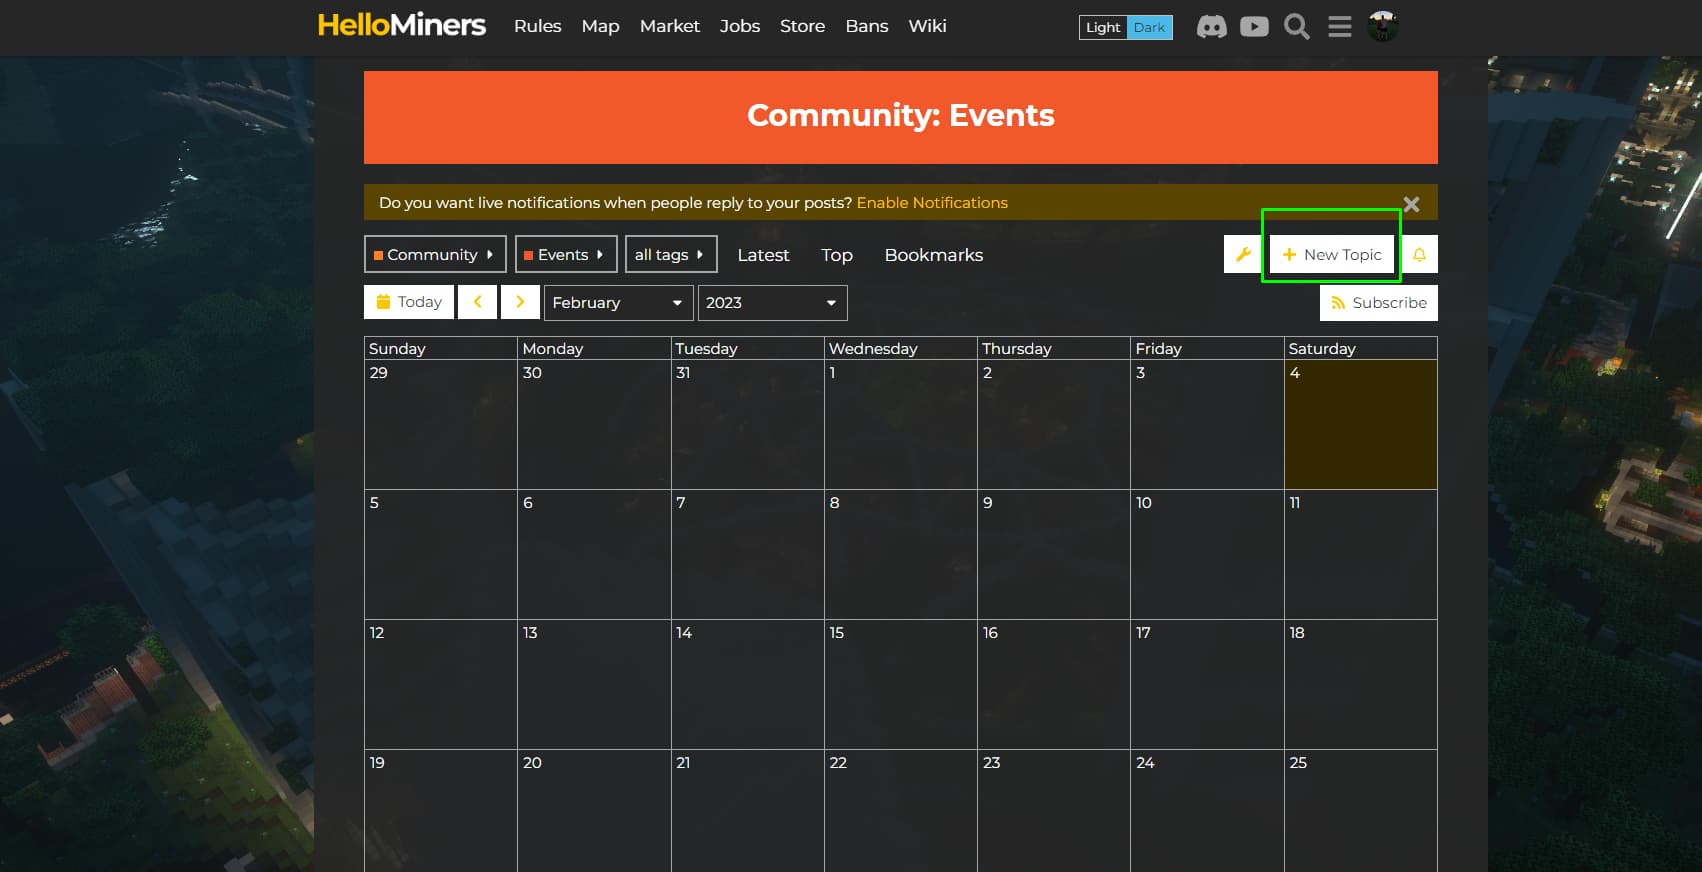
Community Events Post Guide
Check out the Events Category to see a calendar of upcoming community events! Players can submit events for approval here.
How to create an event topic:
-
Select the New Topic button highlighted with a green box.
-
Fill out the title and description with details of the event as usual.
-
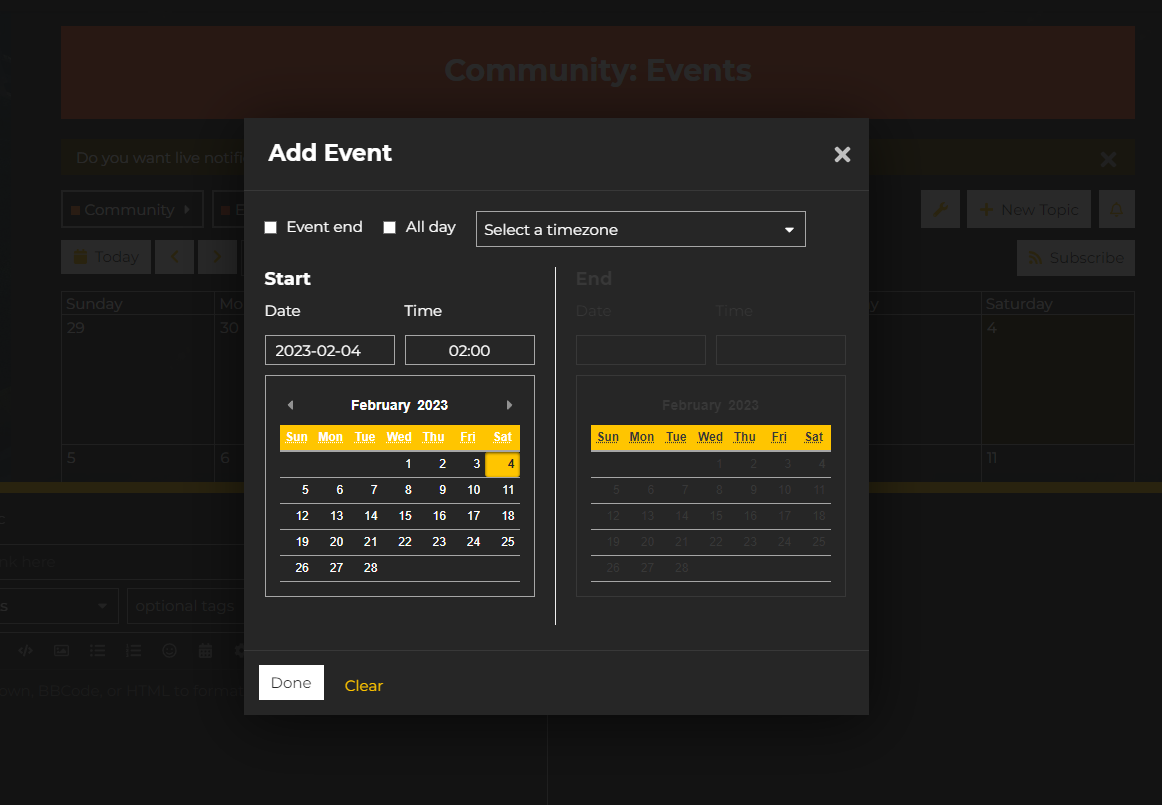
Select the Calendar “Add Event” Button highlighted with a green box.
-
Fill out the calendar setting the date and start/end times, and select done.
-
Select the create topic button to submit for approval. Once submitted, let a staff member know and they will review and approve the post, adding it to the calendar.